Posts Tagged ‘projects’

Swim With The Fishes

Thursday, October 30th, 2014

The aquarium always does fun stuff for Halloween and we’ve been going since Evan was a baby. This year the costume dress up weekend was “Pirate and Princess” themed. Unfortunately, I spend a bazillion dollars on costumes that are not pirates or princesses but were TOTALLY aquarium appropriate…so the kids dressed up anyway.

Although they weren’t eligible for the pirate/princess costume contests, I can promise you Evan won Unofficial Best Costume, just based on the fact that EVERY person we saw commented on it. Because it’s AMAZING.

p.s. The weird spacing thing on photos with captions makes me crazy but I cannot fix it so try not to let it drive you crazy too.

halloween at mystic aquarium

halloween at mystic aquarium-3

She traded her mermaid crown for one she made in the craft room

halloween at mystic aquarium-4

LOOK AT THAT COSTUME

halloween at mystic aquarium-5

They loved all the throwing games to win “pirate gold”

halloween at mystic aquarium-6

halloween at mystic aquarium-7

I wonder if the seals are getting nervous about the shark staring at them.

halloween at mystic aquarium-8

There’s an art installation set up about ocean pollution. This one was adorable/sad.

halloween at mystic aquarium-9

halloween at mystic aquarium-11

He’s goldfish. FYI.

halloween at mystic aquarium-13

Evan saw the pirate and yelled “JACK SPARROW!” and the pirate said “CAPTAIN. It’s CAPTAIN Jack Sparrow!” This was like the 5th time we ran into him just walking around, obviously they’re BFF’s now.

halloween at mystic aquarium-15

This is the best I can do for family photos right now.

halloween at mystic aquarium-16

Sorry Linc.

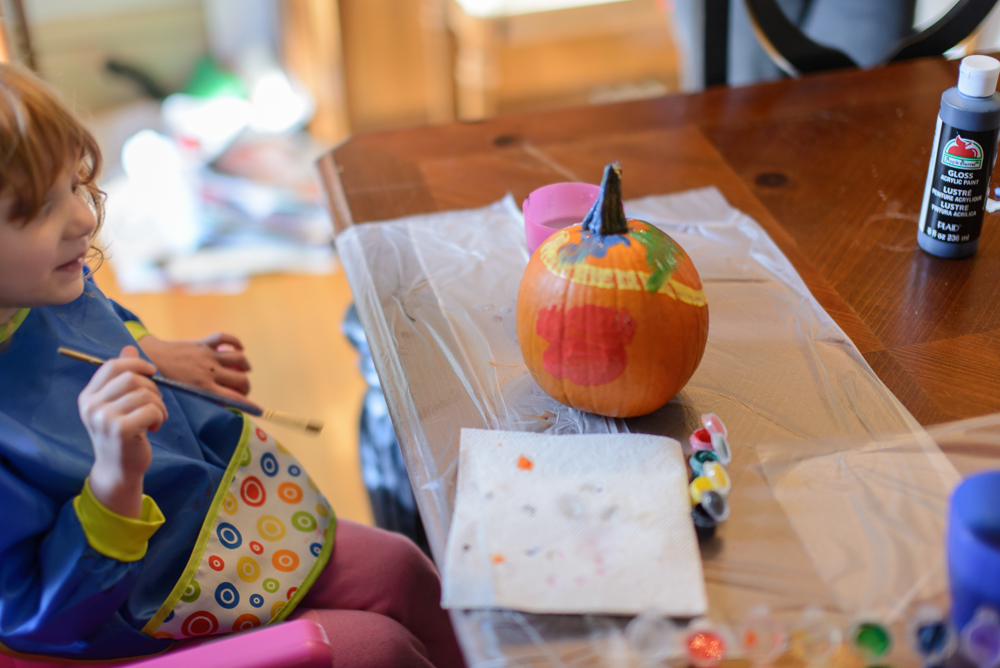
Then we went home and painted/carved pumpkins, something we never managed to get around to last year. Painting is genius, since carving is such a PITA.

halloween at mystic aquarium-17

halloween at mystic aquarium-18

halloween at mystic aquarium-21

halloween at mystic aquarium-22

halloween at mystic aquarium-23

halloween at mystic aquarium-25

DIY Giant Painted Silhouette Canvas

Thursday, April 25th, 2013

DIY Giant Painted Silhouette Canvas

I bought this huge canvas at A.C. Moore a few months ago. They were running an great sale on canvases – I think I bought it for less than $20 – and I’ve been looking for something large to hang over the fireplace basically since the day we moved in 6 years ago. I’ve hung collections of things, put giant vases on the mantel, made banners and art before but nothing has ever really filled the space the way I wanted. I knew a 3×4 canvas would finally be the right size but it’s been sitting in my basement for weeks now while I brainstormed what exactly I should do with it. I am decidedly NOT an artist, and although I found some cool DIY art on Pinterest I wasn’t in love with any of the ideas (and wasn’t confident in my ability to execute them).

DIY Giant Silhouette

While I was talking with my IBFF (internet best friend forever) Amy, she suggested doing silhouettes of the kids. She actually made one and blogged it almost two years ago (and shouts me out in the post, because seriously IBFF!) so I used the same basic idea – took a picture of the kids’ profiles in front of a window, printed them and cut the shape out carefully. But because I wanted to make GIANT painted silhouettes I had to figure out the rest on my own. I had once bought some beautiful City Skyline Silhouette Prints from Fine Line Art Co. I loved those colorful prints of cities.

Supplies:

Canvas
Spray paint
Craft paint
Paint brushes (at least 1 small and 1 large)
Cardstock
Printer
Scissors/craft knife
Box
Pen
Clothespin/tape/paperclip/whatever you need to get the angles right
Smartphone with flashlight app (or a very strong flashlight)

Instructions:

I took my canvas outside to paint it, which wasn’t the best choice because it was pretty windy and I ended up with spray paint on my back door. Eh, not the first time.

DIY Giant Painted Silhouette Canvas

Ignore the tree shaddows

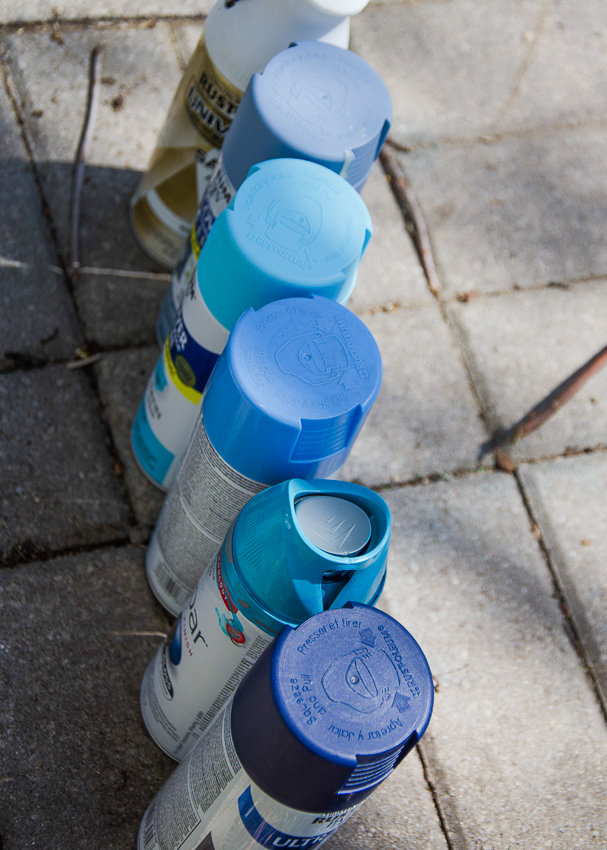
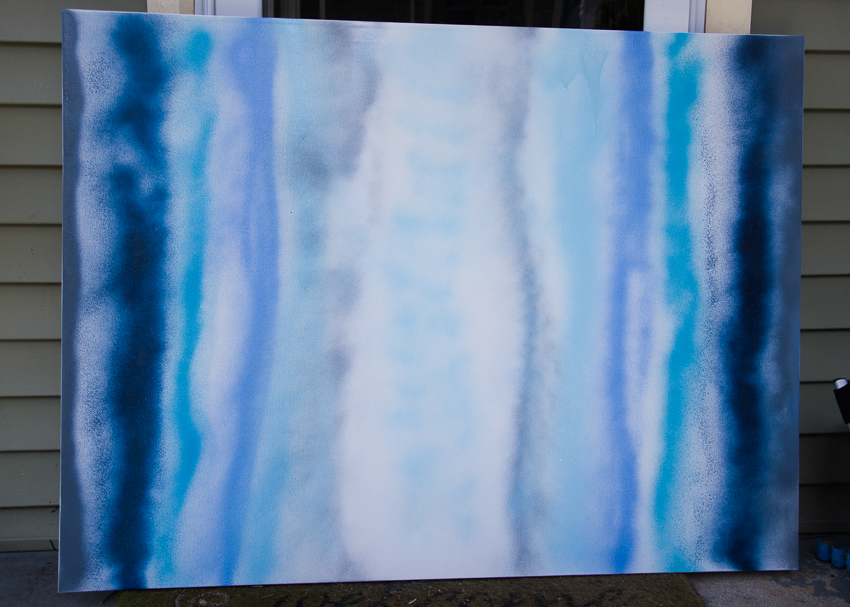
I picked blue for my background colors since I was hanging it in a blue room but any colors would work. In a kid’s room a whole rainbow would be really fun. If you were just doing 1 silhouette instead of two you could do it vertically.

DIY Giant Painted Silhouette Canvas

From top to bottom: white base paint for a picture frame, kitchen stool, nursery project, picture frame, kid-size cabinet, and failed lamp shade project. All found in my basement with enough left for this project.

I lined them up from darkest to lightest and worked from the outside in on the canvas. Then I went back and used the white to lighten anywhere it felt REALLY uneven. This is what it looked like in the bright outside light:

DIY Giant Painted Silhouette Canvas

I’m not going to win any painting contests but I like it (and E was surprised I had made it myself – he thought it was actual art). I let the spray paint dry for a few hours – there wasn’t a lot of paint so it didn’t take long – while I talked the kids into posing for their profile photos. They were both in cooperative moods so it didn’t take long.

DIY Giant Painted Silhouette Canvas

Try to get a picture where your kid’s nose DOESN’T blend into the background. It still worked fine.

To make the cutting edges more distinct I lowered the blacks slider and converted the pictures to black and white in Lightroom (totally optional). Then I printed them out on cardstock (I happened to have brown, but the color doesn’t matter) and cut out just the silhouettes as closely and cleanly as possible.

painted silhouette artwork-6

Then came the hardest part: figuring out how to get that cut-out silhouette big enough to trace onto the canvas.

My first thought was I’d just hold one up next to a lamp and trace the shadow, sort of like a super-simple version of a projector. Unfortunately, a regular light bulb doesn’t direct the light strongly enough to make a crisp shadow. I tried to make a DIY projector with a cardboard box taped over the lamp but it still wasn’t clear enough.

I tried asking the internet and my husband and they both suggested I find an overhead projector so I called the library and after a lot of shuffling departments and waiting on hold they said yes they DID still have a projector and if I wanted to bring my canvas in they could set me up in one of the conference rooms on Wednesday. That would have been a good option if I hadn’t figured out an at-home solution. I got impatient waiting for Wednesday and during a little more Googling I found a tip that the flashlight app on a smartphone makes a really bright, direct light.

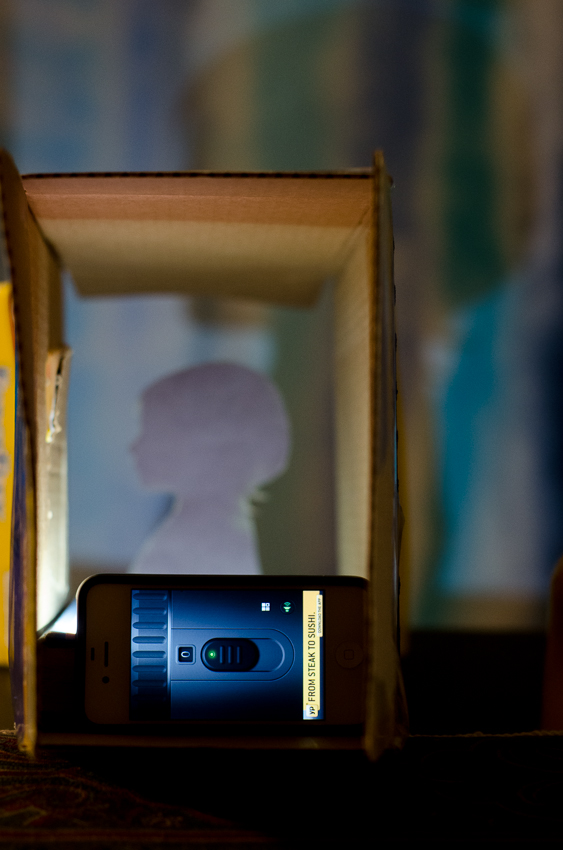
So I made this:

DIY Shadow Projector

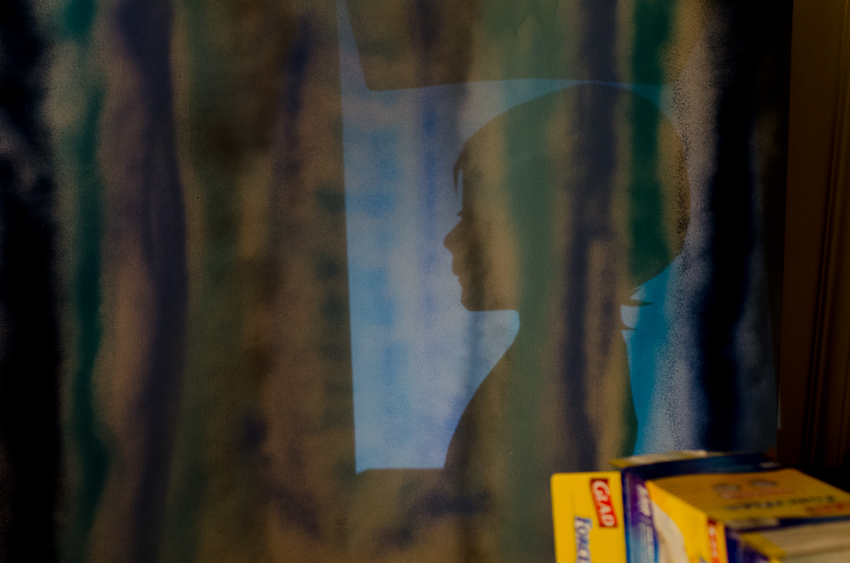
That’s my iPhone with the flashlight app turned on, propped up against a book inside an empty box, with the silhouette clipped to the end with a clothespin. I set it on the coffee table and pulled it back until it the shadow was the right size on the canvas. You definitely need a dark room to make it work right, but luckily the sun goes down around 8 pm (I think it’s called “night”?) so I didn’t have to move the canvas.

DIY Shadow Projector

I traced it with a regular ballpoint pen, being careful not to move the canvas. I should have used a level and a measuring tape to space the two silhouettes exactly right, but I just guessed based on the color stripes on the canvas. Then I switched out Caroline’s silhouette for Evan’s, moved the canvas (it seemed easier than moving the light projector set up) and traced Evan’s. I adjusted the distance a little to make his silhouette slightly bigger than Caroline’s but not so much the finished product would look unbalanced.

DIY Giant Painted Silhouette Canvas

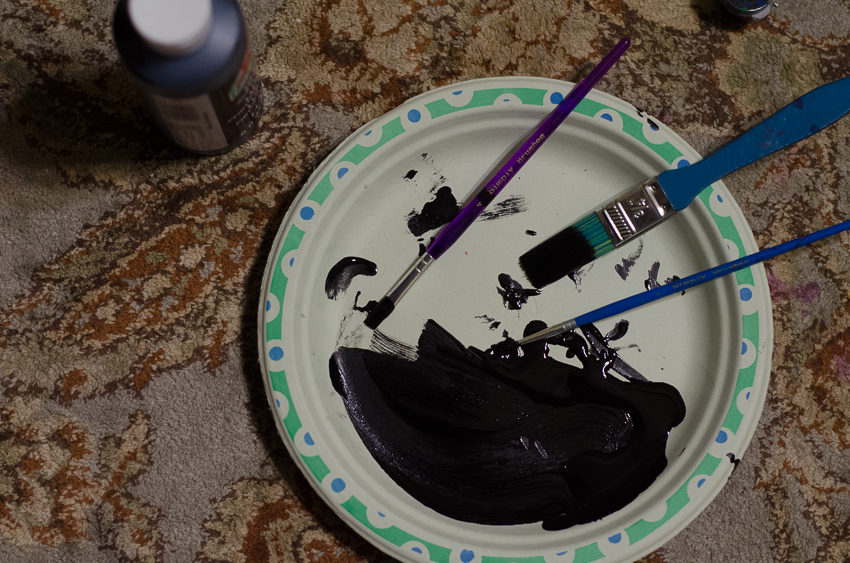
I used black craft paint to fill in the silhouette shapes. I used a medium brush to do the major edges and a tiny brush to do things like their bangs and Caroline’s eyelashes. I filled everything in with a medium sized brush and went back over the edges to make sure they were colored in fully. I messed up both their noses a tiny bit and noses are very important in making a silhouette that looks like your child, so be extra careful. I did NOT wait long enough for it to dry before I propped it up on the mantel, so I got a black paint drip on Evan’s side. Luckily the cheap craft store brand of paint was easy to peel off the spray painted canvas so I fixed it. The other option would have been taping up the silhouette and spray painting over the mistake.

The last step was finally taking down the train station banner from Evan’s birthday party and putting a nail in the wall to hang it up!

DIY Giant Painted Silhouette Canvas

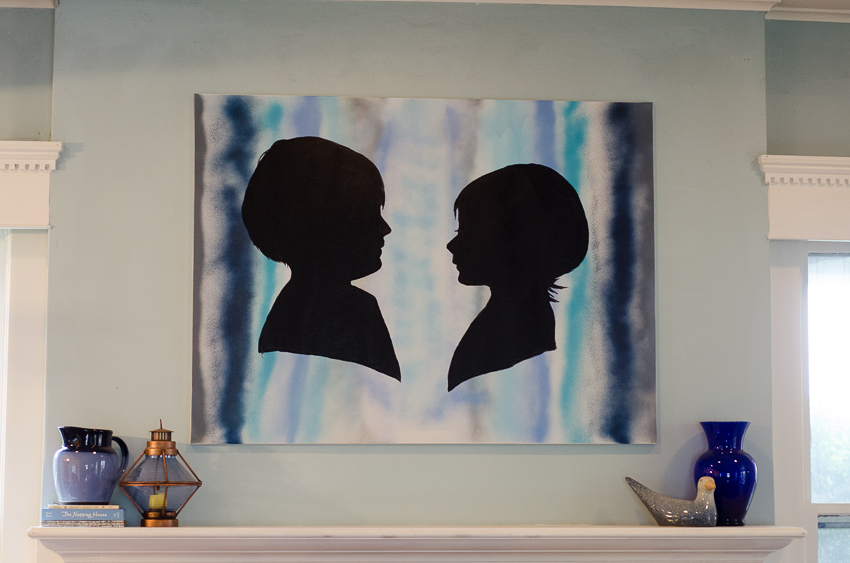
Aaaand then take some pictures. I’m happy with how it turned out. High fives for easy, inexpensive artwork!

DIY Giant Painted Silhouette Canvas

Ta-da! I’m so excited to finally have something to fill that space after six years. Total cost: $25 for the canvas sinceI had everything else on hand and approximately 45 minutes worth of total work. Let me know if you try something similar, I’d love to see your spin on it!

Year End Wrap Up Whatever

Friday, December 30th, 2011

So long, 2011. You were cool and all, but I have PLANS in 2012 and they cannot get here fast enough.

In January I adjusted to being a mother of 2 by almost falling apart and dispensing tons of helpful advice, but I also discovered how much I LOVED having another kid. I shared pictures of Caroline’s nursery, posted my tutu tutorial (one of my top posts ever!) and failed at cloth diapers.

In February I made some muffins, which might have contributed to my slightly ranty post about my feelings on dieting.  I had a huge realization about why doing the dishes wasn’t such a chore after all – although honestly, I should reread that once a week, since I’ve pretty much forgotten it again. Because I like embarrassing myself, I shared my high school poetry anthology and I talked about headbands. A lot.

In March I failed at parenting not once, but twice. I tried to decide if the kids looked alike or not. And I bemoaned how even good advice isn’t always good.

In April, Evan turned 2 and we gave him a room makeover and an awesome birthday party. I embraced my inner hippie and joined a CSA (which turned out to be a GREAT decision). I knit some cute stuff while avoiding knitting the sweaters I’ve had started for more than a year. I had totally forgotten I made these scones until just now but I’m definitely making some this weekend.

In May I discovered Pinterest and my life was never the same. I tried to explain how hard it is to get things done when you ALSO have two kids to watch. I dressed Caroline up for a baby fashion show. To battle the evils months I reorganized my pantry and made it prettier. And then my toddler drove me to drink by asking WHY a zillion times.

In June I made a list of ways I might be crazy, but it turns out a lot of you are crazy too. We took on the hugest house project to date and built ourselves a gorgeous patio. Caroline had her half birthday – and it’s so crazy to look back at my just-barely-sitting-up and not-yet-crawling baby compared to the second half of the year! I wrote about the evils of Pull-Ups  and the joys of my amazing stroller.  And I complained for the zillionth time how parenting feels unequal.

In July I joined Weight Watchers (something I see to have forgotten recently) and  shared some of the amazing handmade shops I’ve found. I took a lot of adorable pictures at Lake Compounce and the Sunflower Festival.

In August I went to BlogHer, posted my 1000th post, and celebrated my 7th wedding anniversary. I dorked out with my kid’s dinosaurs and Caroline took her first step. I also baked a galette and redecorated my living room. And we all survived Hurricane Irene with minimal fuss.

In September I made a lot of stuff, like sriracha and cupcakes and shit with pinecones, which is one of my top visited posts ever. We went to the beach, which was epic. I decided having two kids wasn’t so bad after all.

In October we went to the fair and I met one of my long time interwebs friends IRL. We had a Halloween party where Caroline was her sunshiney self. Evan turned two and a half. I did that stupid accent meme vlog and I told the story about how I was once almost in a movie.

In November I posted every frickin day, which is too exhausting to recap.

In December I tried and failed at twinkle pics of the kids. I declared potty training a success but not necessarily a happy one but having a two year old is still kinda awesome.  I made super delicious cookies and the internet agreed. Caroline turned one and I threw her a pretty nice party. Then we tortured the kids with the all important Santa picture and had a very nice Christmas.

Whoa, I sort of can’t believe all the stuff happened – and that I wrote about all of it. I think I liked 2011 better than 2010, mostly because I was less sick, not pregnant and really let myself blog for the love of blogging (mostly). I am going to KEEP enjoying myself in 2012 and I’d be honored if you decided to keep reading.

Pati-OMG

Monday, June 6th, 2011

Here’s today’s free tip: THERE IS A REASON IT COSTS A LOT OF MONEY TO HAVE A PATIO PROFESSIONALLY INSTALLED. It is not a nice, easy weekend project. It is a ton of work. Actually several totally literal tons. Tons of brick and sand and gravel and dirt. “More dirt!” was our mantra of the week – even the toddler says is now. Constantly. There is dirt under my fingernails I may never get out. Every surface on the first floor of the house is coated in grime. Even the carpet in my bedroom THREE FLOORS UP is dirty. It’s going to take me another week just to get the house clean.

Ok, it’s going to take me a MONTH to get the house clean – because I’m going to be too busy relaxing on my patio to bother with vacuuming. Who can be bothered when there’s s’mores to be made and wine to be sipped from my classy new plastic wine glasses?

This is not the dramatic before and after picture post (that one is coming as soon as my dining table gets here)(and after E builds me a shelf)(unless he takes a month to build the shelf because I am not waiting that long) that’s going to BLOW YOUR MIND. This is the “look at all the work we did to get to the “after” post” so the after post doesn’t end up being a bazillionty pages long. Now it will only be half a bazillionty pages long.

This is the yard in March, before the lawn guys raked up the leaves and before most of the green stuff came up:

Here’s the yard just last week:

The grill was totally neglected in that dirt spot behind the big tree, the flagstone paths were always full of weeds and impossible to shovel in the winter, the grass never grew next to the garage, the back steps were a MESS and the slope of the yard meant there was a huge mud puddle right in front of the steps when it rains.

It was not a good space, not for me, not for E, not for the kids.

Here’s how we started the project:

E and I tore up all the walkways, but saved the stone to reuse in the project later.

E built a planter bed out of 4×4’s behind the tree so we had somewhere to put all the dirt – and so I had someplace to put all the hostas I dug up when we took out the walkways.

Dad and E spent TWO FULL DAYS just digging. I helped (truly, I did help) but I am just not strong enough to do much good. That tiiiiiny hill to the left of the garage ended up being full of roots and concrete. They worked so hard they both deserve medals. And several cases of beer.

Mom did a GREAT job watching the kids, especially since Caroline has been a crazy teething monster for days and needed CONSTANT attention. I seriously don’t know what I would have done without Mom.

These are the pavers I chose for the patio – they’re just brick that’s gray instead of red. It was a budget choice as much as an aesthetic one (they were about $2.o4 per square foot), but in the end I LOVE them. E and I did all the design stuff ourselves with some practical and/or math help from my Dad. We ordered 2250 of these…and have about 14 left over. GOOD ESTIMATING.

These are the stone we chose for the retaining wall. I was very excited to find that these only cost $2.15 a piece, which was LESS than the ugly cheap looking ones. We went back for more twice to get the height/length of the wall exactly right but since we only bought a dozen at a time we didn’t need them delivered.

So in total, we had to dig down 6 inches from where the top of the pavers were supposed to go to lay down 3 inches of gravel and then an inch of sand (the pavers were 2 inches high). And when we finished digging out each of those layers we had to make sure the top was totally level. E leveled dirt AND gravel AND sand with just some 2×4’s and PVC pipe.

We ordered the gravel and sand from a local family place (actually the same family who we buy our Christmas tree from) and they delivered it all in big giant trucks that dumped it in our driveway. It was SIGNIFICANTLY cheaper (close to 70% less) to order it in bulk than to buy it in bags from the hardware store. They also helped us figure out how many cubic feet to order to cover 500 square feet of ground.

After the gravel was all down, we rented a stamping machine from Home Depot. It took just a few minutes but was TOTALLY WORTH IT. The special gravel is made of lots of different sized pieces so when it gets pounded by the machine it locks itself together and becomes almost like cement. There is NO CHANCE any weeds are growing up through this patio (also because we laid down landscaping fabric).

My dad’s mantra when he does projects is “We have to do it RIGHT.” That included getting the yard almost totally level – I say “almost” because we intentionally sloped it a little so the water would drain away into the flower beds. We also added a drainage pipe to the downspout that runs under those steps made from 6×6’s so water from the gutters won’t wash anything away.

We might have broken our own rule and worked in the dark a few times once we realized we weren’t going to be done with our “easy project” by Wednesday.

The pattern for the pavers is called a basketweave, and that line of bricks around the edge is called a soldier’s course. Doing a curve along that wall and another along the back meant a lot of brick cutting, but Dad had a diamond blade for his saw so it wasn’t too hard. We added black edging to the sections that didn’t abut something solid so the pavers won’t move over time.

Little Evan was an expert shoveler by the end of the week and helped with spreading out the sand. We put sand over the pavers and then rented the stamper machine again. It leveled all the pavers and forced the loose sand into the cracks so now it’s all one extremely solid surface.

After it was stamped and swept again and wetted down we did all the clean-up work – cutting landscape fabric, planting things, putting together furniture, hanging lights. By the time my parents left our driveway on Sunday morning the only thing that wasn’t 100% done is reseeding parts of our lawn.

And here is a sneak peak at my “hanging out on the awesome patio” after photos. Also, my husband’s butt. He was grilling, which makes it even better.

More pictures coming soon – and finished, final, awesome, magazine-worthy makeover pictures coming hopefully before the weekend. Also coming: your invitation to a barbeque. Seriously, who wants to come over?

P.S. Before you ask, the answer to “will you come do mine next?” is NOT FOR ALL THE WINE IN THE WORLD.

Mission: Pantry Organization

Monday, May 23rd, 2011

One of the disadvantages of living in an old house is a lack of closet space. Lucky for me, a previous owner did some rearranging and found room in our first floor hallway for a pantry. Bless their heart. Unfortunately, it’s not actually in the kitchen so when I’m putting away armfuls of stuff after making dinner I tend to just toss it onto the shelves so I can make as few trips as possible. Then I have groceries to put away and that stuff just gets shoved onto other shelves and before long I have fourteen cans of chicken broth because I didn’t see the ones behind the nine kinds of vinegar (<—– not an exaggeration. I use a lot of vinegar).

Also, I have pantry months. If you don’t have those in your part of the country, just count your blessings and enjoy not having to wrap up your pasta in Ziplock bags. So while I cleaned and de-mothed and threw out canned pineapple that was supposed to be used by June 2007 I decided to reorganize.

BEFORE:

AFTER:

Better, right?

I put a plain old shoe organizer over the door and filled it with anything that fit. Now I can see if I have taco seasoning or cocoa powder without digging through my shelves.

I put the stuff I use the most right at eye level and the stuff I only need once in a while high and low.

I painted the left wall with chalkboard paint (oh how I love chalkboard paint!) and attached chalk to a string so I can keep a running list of stuff as I use it up.

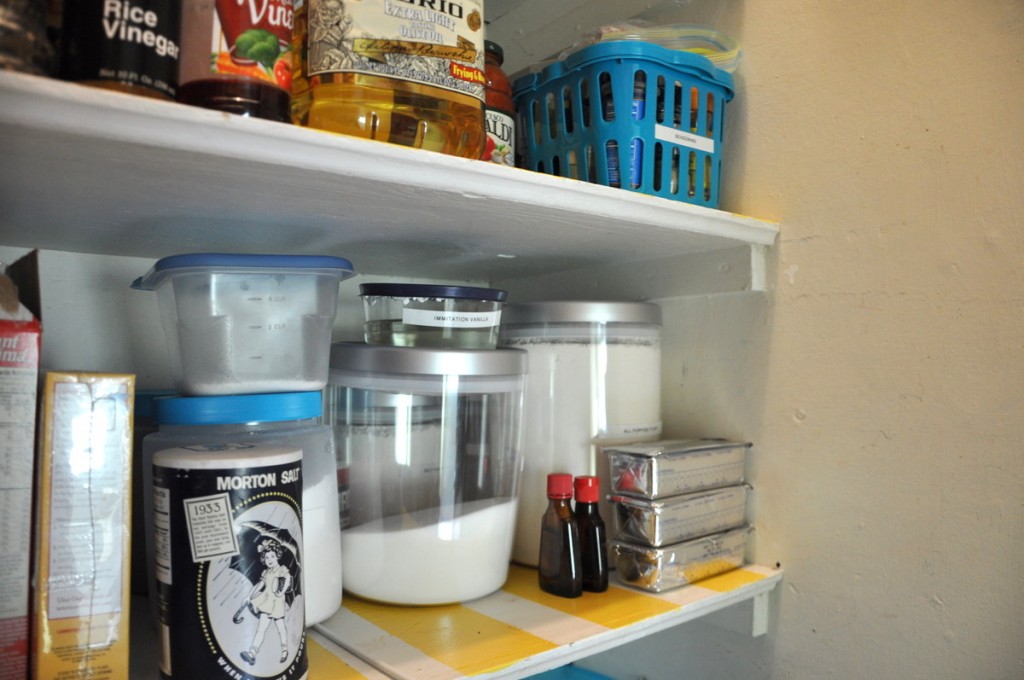
I reorganized items by how often I need stuff – that middle shelf is things I use almost ever night for dinner. Because I put so much on the door I now have enough room to see what I have and stock up on things we use most often, like tomato sauce and couscous. I added the stripes to make things fancy – I’ve been looking at too many Martha Stewart pantries on Pinterest. The stripes reminded me of an old fashioned grocer.

I used $1 baskets and bins to sort things that go together – cookie decorating stuff, tea, seasonings, herbs and spices, my emergency candy (labeled: emergency candy).

I used two $1 shower caddies for onions and potatoes. They’re on hooks so I can take them off the wall and rinse them out when I inevitably forget about a potato and it ends up molding.

I put all my flours and sugars into sealed containers to keep the months out. I splurged and bought large, wide mouthed ones at Target because I HATE trying to pour dry ingredients instead of scooping them with my measuring cups. They were the only part of this whole project that wasn’t either free (I already owned the paint, brushes and tape) or $1 (the baskets and smaller plastic containers).

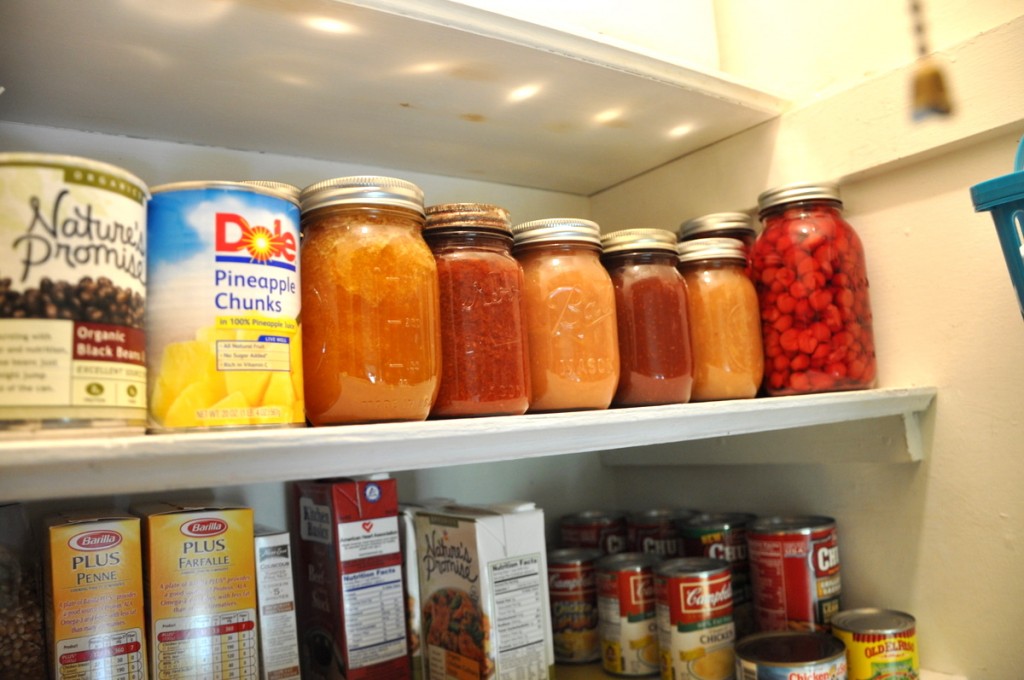
See that top shelf? That’s apple, peach, strawberry and cherry jam plus sour cherries for pies all homegrown and hand-canned by my mother-in-law. Are you jealous yet? Come over and I’ll make you a pie – after I force you to admire my pantry in person. Yeah, I might be just a little too proud of FINALLY getting this mess cleaned up.