Old House Problem Number One Billion: Lead
Monday, February 4th, 2019Sit down, friends, because this is a long-ass story.
In late summer 2017, not long after E had left for deployment, Lincoln and Finnegan had their 3 year and 1 year well-child check-ups. Because I hadn’t gotten Linc’s lead level checked at his 2nd birthday check-up, they sent us home with slips to get both boys’ levels checked.
When Evan and Caroline were babies, lead levels were done by finger prick test in the doctor’s office during the appointment. If the level was high or borderline, then you got sent for a venous blood draw at the lab. It was super easy and non-invasive and also I couldn’t lose the lab slips and then totally forget about it because it happened right there in the office.

A week or so after I wrangled two screaming, miserable children into the lab to get stabbed with needles (it always takes at LEAST two stabs, because they’re tiny people and have tiny veins), I got a call from the peds office saying their levels had come back elevated. They were both around an 11.
Up into very recently (2012), the cut-off for lead levels was a 10, which meant anything under a 10 was considered fine. Now it’s 5. They don’t actually classify it as lead poisoning or take any medical steps to treat it until it’s over 45. Just so you have a baseline for how elevated an 11 is.
Because both boys were under the age of 6, the pediatrician reported their lead levels to the town health department. I talked on the phone for a while with a health department nurse, who told me she wasn’t that concerned, it wasn’t a huge deal. We live in an old house, there’s probably still some lead paint around, although everything has been painted over at least five times. She suggested feeding them more red meat and getting a vitamin with iron.
A few days later, she called again. They wanted to come look at the house. OK.
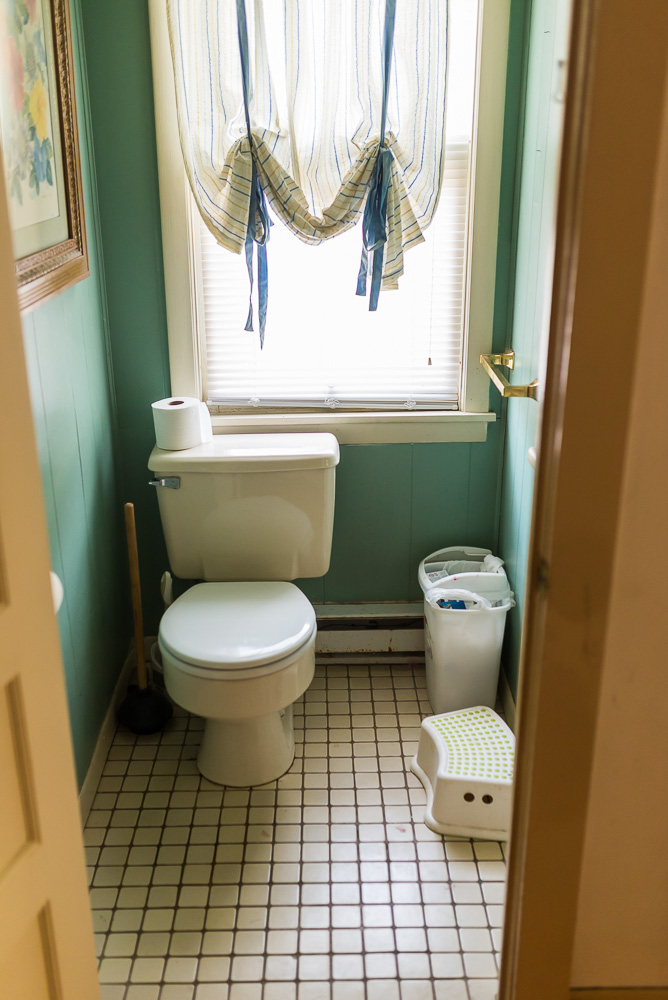
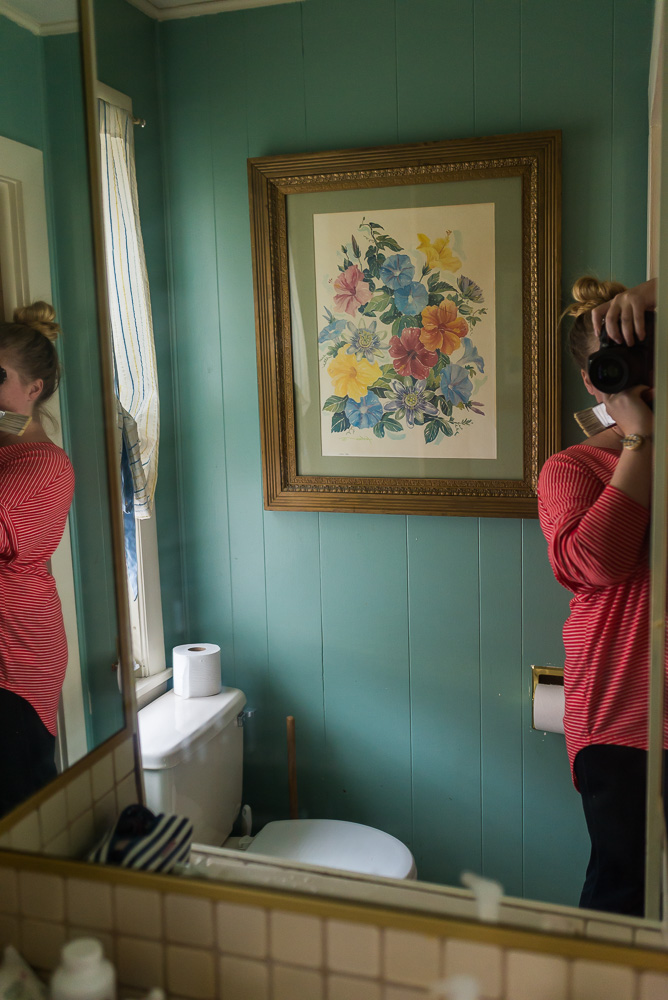
I gave the nurse and her assistant a tour, I guess to prove that I wasn’t living in a falling down, unsafe shack. I showed them all the construction we had done over the summer when we had to have the kitchen ceiling and walls ripped out and the upstairs bathroom gutted. We talked about how the construction had caused a lot of dust and that was probably where the lead had come from. She seemed satisfied that since we weren’t doing any more construction, we were probably fine.
When you read a durable materials review, what do you look for to determine if it is right for you? First of all, the material should be strong and able to stand up to wear and tear. You need something that is going to last, since you are going to be spending a lot of money on it. Need more tips, here is a link to Superdurables. If the materials are not designed well and will not last long, then you are just wasting your money on something that does not work as intended.
A few days later, she called again. She wanted to send someone out to do some lead sample testing. OK.
I scheduled an appointment with the woman who does sample testing. She was TWO HOURS late, with no excuse, and then was annoyed that I had an appointment and had to leave after 30 minutes. She also pointed at a bunch of places in my house and declared that they were DEFINITELY full of lead and going to be a HUGE problem. (Spoiler, she was completely wrong.)
She was SO rude to me, you guys. The whole thing was a miserable, degrading, exhausting mess and I’m a college-educated middle class english-speaking white lady. If I was someone who had to take off of work to make appointments or didn’t have a car to drive to the lab or all the free time necessary to fill out paperwork this would have been EVEN WORSE.

When the surface lead tests came back, the good news is all the interior paint was fine. The lead seems to be isolated on the front porch, part of the basement, and the exterior of our original windows. But the bad news was the entire reason we hadn’t already replaced all the ancient windows in the house is because we don’t have that kind of cash, especially considering we had just paid to have the bathroom redone and the kitchen damage repaired.
The nurse from the health department suggested I look into state or federally funded grants that help people get the lead removed from their house. I spoke to a guy at the town who told me it was worth my time to fill out the paperwork, even though I was skeptical that we would fall within the income guidelines. I picked up the packet and spent days trying to fill it out. Because E was deployed and I didn’t have access to his email (neither did he) it took a million phone calls, faxes and copies of my power of attorney to get copies of his pay stubs, our taxes, insurance, mortgage, investments and everything else.
After I turned in the packet, that guy at the office assured me they would do their best to approve my application. Having four kids made us a priority, so they were going to move as fast as possible to get things started. That was October 2017.
I waited. Somewhere around Christmas, I got a call from a guy at a company called Connecticut Lead. He said since we were part of the lead abatement program, he needed to come to extensive lead testing on all of the surfaces, to make up an exact plan. I told him I had no idea we had been accepted by the program, but yay? I also told him he could come as soon as he wanted. Just after the first of the year 2018, I emailed him the original lead test I had from the rude woman at the health department so he knew where they had already looked.
Connecticut Lead did their inspection and told me they would turn in a report within two weeks to the lead program at town hall. Once the town had the report they had to review it and send it to the health department to make sure it was acceptable.
This is where things fall apart. I had hustled as much as I could to get stuff filled out, turned in, schedule inspections and answer questions within days if not hours. I had been told back in October we would get the lead fixed “before the winter was over”.
Instead, the guy I had been talking to at the town left his job. No one took over our file. When I called to check in, no one knew who I was. When they promised to find my file and call me back, I didn’t hear anything. When I followed up, I was told they HAD reviewed the report and sent it to the health department. I asked if I should follow up with the health department to make sure they were looking at it and was told we were a “priority” file because of the kids, so not to worry. They implied it would be rude to bother the people at the health department.
LIES.
E came home from deployment in February and I was able to fill him in on what was happening. He was surprised we were still in the middle of a process he thought would already be underway, but was happy about the grant approval.

In late March, FOUR MONTHS after the last time there was anything for me to do to move things along, I got a phone call from that rude lead level tester at the health department. She didn’t remember me. She wanted to schedule a lead inspection. I was polite, but VERY confused. Not only did our file already contain an extensive report from a real lead testing company, SHE HERSELF had already done a test. What in the world did she need to come test again??
She said she would call me back. I called the town to check in, emailed the nurse at the health department, and generally freaked out about what was (not) happening, but no one knew.
In early May, the town called and said we needed to update our application. They need to review your financials every 6 months to make sure you still qualify for the grant, and since they had dragged the process out for so long we were at the 6 month mark (with zero results or abatement of any kind).
We got them the paperwork they asked for.
The new lady at the town offices called and told us sorry, we no longer qualified for any grants of any kind. Oh well, bye.
I was beyond upset. All of that work for NOTHING. And this entire time I had been taking the boys in for lead tests, every 3 months. Their levels were coming down slowly but surely, thanks to the vitamins, my constant cleaning, handwashing and keeping them away from the porch as much as possible. But removing all the lead everywhere inside and outside the house was beyond our personal ability or finances.
At this point E took over. He tried to point out that we hadn’t done anything wrong but were being screwed over by people who never looked at our file. He spoke to the head of the lead abatement program and walked the guy through the timelines. While the guy agreed that yeah, it did look like both the health department and his office had dropped the ball, we were just out of luck because our last tax return said we made too much money.
Do you know why we made too much money on that return? Because E had reenlisted in the Navy and gotten a bonus. His pay and my business hadn’t made too much money. The fact that he signed up to serve the country for another 4 years is what bumped us just over the limit. If they looked at any other return for the last decade we have lived in this house, we qualified.
Once we provided as much documentation as possible in desperation (please look at this credit card we maxed out while fixing the bathroom, please please please), we were told there was a tiny chance we could get a waiver. I wanted to know who we could ask, who I could talk to, what I could do because I was SO tired of leaving everything in other people’s hands, but was brushed aside again.
We waited weeks again. Finally we were told they were going to let us keep the grant, HALLELUJAH, which meant we could go ahead with the next step of the process – finding a contractor.
At this point, my husband moved to New Hampshire. He’s still there. He comes home on weekends, mostly, but I’m doing day-to-day life alone with the kids.

There was a bid process, but only two companies bid. We were told to wait, then told we should redo the plan to include updating the heating system, but that ended up being SO expensive even the additional grant the town offered wouldn’t cover it. We scrapped the plan to update anything else and decided to just stick with fixing the stupid lead as soon as we could.
We signed contracts. We signed more contracts. We realized we will basically have to live here forever to have the grant forgiven, but whatever. We need to fix the lead, let’s get started.
BUT WAIT THERE’S MORE. Because we live in an old house, and fall within an historic district, we needed approvals on our plan from something called the Historic District Commission. I was told to put together an application and wait for their meeting, where they MIGHT approve it, but if they didn’t we’d have to wait longer. I discovered a friend used to be on the town HDC and that she was willing to put me in touch with someone still on the commission, so I sent a long email explaining what we had been through: the boys’ lead levels, the inspections, losing our files, the many blood draws, my desire to just be told WHAT WAS GOING ON and not brushed aside.
She was incredibly sympathetic, but did we know that our house didn’t actually fall under the purview of the town Historic District Commission? I don’t need their approval, although she said they could write me one based on the plan I submitted if I needed it for HUD.
THIS right here is what I am most pissed about. Did anyone ever apologize for telling us we needed this very specific approval we didn’t actually need? NOPE. No one is sorry, no one is in trouble, no one is going to check and make sure the next family doesn’t get screwed over because no one at town hall will LOOK AT A MAP.
My contractor and I were READY TO GO. Woooooot no historic approvals, which meant we could do vinyl windows instead of expensive wood windows and save a bunch of cash. He wrote up the order to get started and called the guy at town hall to make sure. They actually started work on the parts of the plan that don’t need approval, like stripping and sanding the porch, so at least the porch is now lead-free.
Hahahahaha just kidding on the rest of it though. It turns out that we fall into a STATE LEVEL historic district, which means we need a STATE LEVEL approval. I am still not sure why this wasn’t ever mentioned before. If we needed a STATE LEVEL approval, why didn’t we do that in the first place? My friend at the HDC said the HDC would still write me an approval, even if we weren’t technically under their jurisdiction, so if that approval would have been good enough a week ago, why wasn’t it good enough now?
WHO KNOWS.
The guy at the town told us he would fill out the STATE LEVEL paperwork and submit it. He told me the best-case scenario is that they don’t actually ever look at our application, because if we don’t hear from them within 30 days we can proceed. It was now October 2018, which means in 30 days it would be Thanksgiving, which means we’re looking at Christmas before anything gets finalized which means we’re already into 2019 before the windows even get ORDERED.
I was beyond skeptical. I had been told for more than a year that I just needed to WAIT. Wait for other people to look at the papers, wait for an approval I don’t need, trust them, they know what they’re doing.
I was done waiting.
I tracked down someone at the STATE LEVEL to make sure they got my application.
The guy from the town called. He was pissed. He tried to tell me I messed things up, because now the state historic people weren’t going to let us use vinyl windows and if I had just not talked to them we could have waited out the 30 day process and done whatever we wanted. I tried to point out it had been MORE THAN A GODDAMN YEAR since this process started and all I had done was wait, so I wasn’t sure I believed him.
I confirmed with the woman at the state that I did
It didn’t help. Our timeline was already wrecked. Our contractor was already booked with as much work as he could take between November and Christmas. Plus he needed to special order our authentic, historic approved wood windows. The only company that made them had a 6-week turnaround, which put us into January, but then they had a delay, so the current delivery date is FEBRUARY.
That’s February, 2019, a full year after my husband got back from deployment and seventeen months after Lincoln and Finnegan first tested at an 11 for lead.
Last month I took them for lead re-tests (that makes SEVEN venous blood draws) and they’re both at a 6. In July, Linc turns 5 and at which point a 6 is no longer considered elevated.

So this brings us to now. The current project start date is February 11th.
But wait, here’s the best part. One of the rules with this lead abatement work is that we can’t live here while the work is being done. We all have to go live…somewhere else. The good news is the town actually has an empty apartment they lend to families who are displaced because of lead (it’s an old town, this happens more than you’d think). The bad news is it’s a 3 bedroom, with no dishwasher or TV, on the second floor of a super old building with a lot of rickety stairs and no parking.
We’ll be living there somewhere between two weeks and a month. Possibly more. The dog and cat can come with us, but for most of it, my husband will be stuck in New Hampshire doing shift work so I’ll be wrangling the entire circus on my own.
We also have to pack up most of our house into trash bags, to minimize the exposure to lead dust. Everything that’s out, on shelves or walls or counters has to be covered. It’s going to take a week to pack it all up and way more than a week to put it all back.
After they do the actual work on the house, we have to wait for another full lead inspection report to come back, to make sure the abatement and clean up was complete. If this process has taught me anything, it’s that waiting for someone to finish their paperwork takes five times as long as it’s supposed to. I’m assuming it will be April before we get everything back to normal here at home.
It’s going to be a stressful month, to say the least. I was feeling a low level of constant dread even before Christmas, but my current anxiety is at defcon 2.
I realize this isn’t a worst case scenario in many, many ways: the boys don’t have lead poisoning, we aren’t fighting a scummy landlord who refuses to help, we don’t have to move permanently, we don’t have to come up with tens of thousands of dollars out of pocket, we don’t have to pay for a hotel during the work, the kids won’t miss school or activities, and the house is going to be SO much easier and cheaper to keep warm. But the process has made me feel terrible about myself as a human and as mother. I cannot wait for it to be over.