Posts Tagged ‘wayfair’

Sit Back & Relax

Friday, April 28th, 2017

April shower are just about over and that means I’m excited to get my May flowers into the garden in the next couple weeks!

Wayfair sent me two unfinished wood Adirondack Chairs to customize so I could put my own spin on them and add them to our backyard patio. I’m still in the process of cleaning the space up and getting our garden ready for spring and summer. Nature does not want to cooperate. I don’t want to plant anything until I’m sure it won’t freeze. I can’t do yard clean up if all the leaves are wet because it’s been raining for days. I can’t paint chairs on the patio if it’s pouring. And also (this has nothing to do with nature) it’s hard to make my garden dreams come true if my handyman (aka husband) is always gone on work trips.

But between rainstorms and travel, E got the chairs together and out to the garage and I got them painted and accessorized.
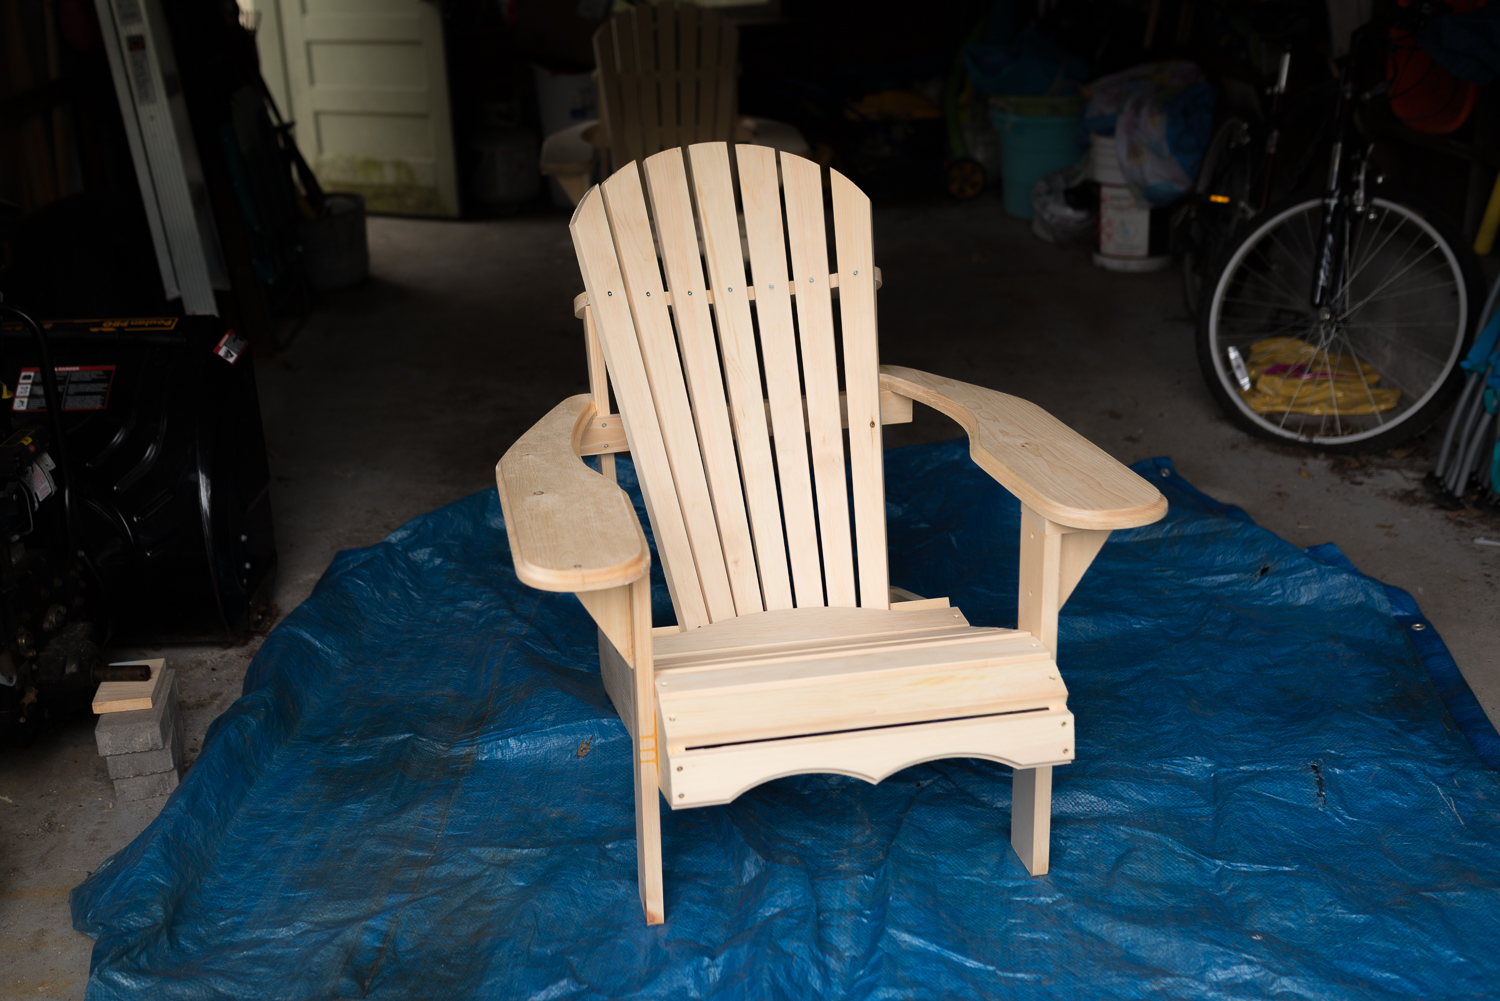
The chairs are solid wood and really sturdy. They came in long thin boxes and it took E a little while to put them together, but they are definitely not coming apart again. (They almost ended up living in the basement though, because they baaaaaarely fit up the stairs.) They’re very generously sized, with wide armrests perfect for resting drinks.

The idea of painting in between every one of the slats with a brush was exhausting, so I went with the easier option. I bought 3 cans of the yellow and used 2.5 of them to cover both chairs. I used painter’s tape and some old paper to define the stripes I wanted to paint. To be totally honest I just did my best guesstimate and it turned out FINE – the screws on the back of the chair made it easy to line up the tape and I was trying to finish during naptime so finding a tape measure wasn’t going to happen.

How fun are those colors? Our outdoor seating is dark brown with beige cushions so that bright pop is going to be so cute out in the yard. Our old wooden table fell apart over the winter so we’re in the market for new patio furniture table too, but these will be perfect for sitting and relaxing with snacks and a glass of wine or a beer now that it’s finally warming up.

And today it is FINALLY nice out, so I moved the chairs to the yard where I can keep an eye on Linc’s dirt digging work while I enjoy the sunshine. I picked up a couple of throw pillows to make them even cuter. I got super lucky and found these at Big Lots – aren’t they perfect?

Linc definitely approves of the new chairs.

And now that the sun is shining I can mow that crazy grass. I’m so happy it’s finally time to sit back and relax in the yard!

Backyard Campfire Fun

Thursday, September 29th, 2016


600x200_anightaroundthecampfire


It’s fallllllll! (Imagine me saying that in my best Oprah voice.) But that doesn’t mean it’s time to hide inside. It’s the most magical time of the year here in New England, where the days are still warm enough to be by the water but you have to close the windows at night or you can’t feel your nose in the morning. There’s chowder and donuts and cider and wine and oysters to enjoy outdoors. And it’s the perfect time of year to have a backyard campfire, right on our own patio.

end-of-summer-campfire-1

You can check out my idea board at the end of this post for links to items (or similar items) from Wayfair. They’ve got just what you need.

end-of-summer-campfire-2

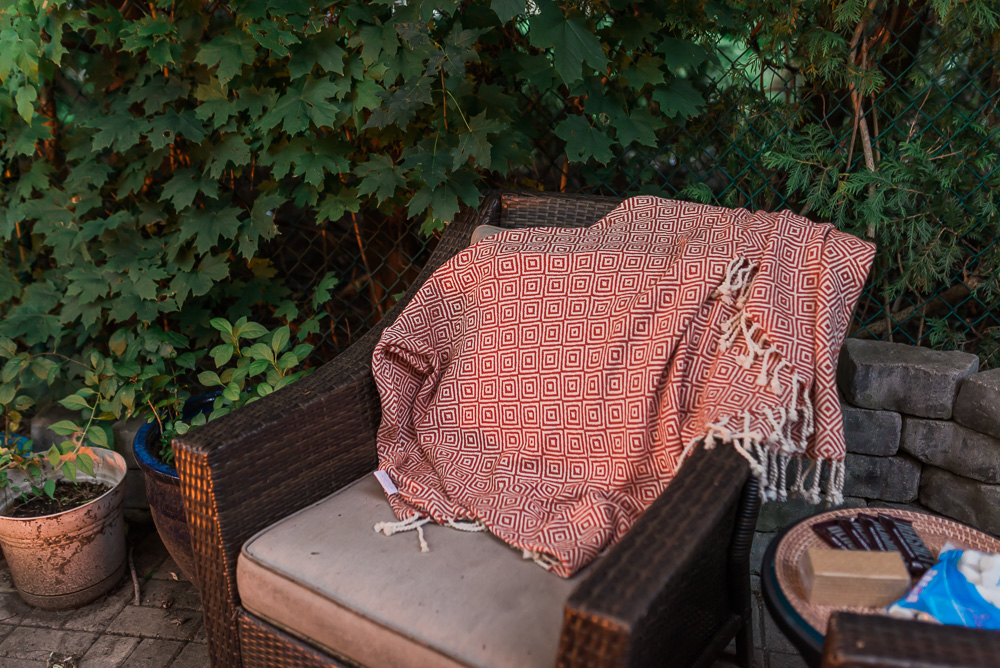
Cozy, easy care cotton throws and fun pillows gave our old furniture new life.

end-of-summer-campfire-3

Lantern string lights add ambiance and warmth while you’re waiting for the fire to warm up.

end-of-summer-campfire-4

Plastic wine glasses = no chance of shattering them on the patio stones.

end-of-summer-campfire-5

Same deal with the tray – looks like rattan, but it’s actually plastic for easier clean up and no chance of breaking it.

end-of-summer-campfire-6

end-of-summer-campfire-11

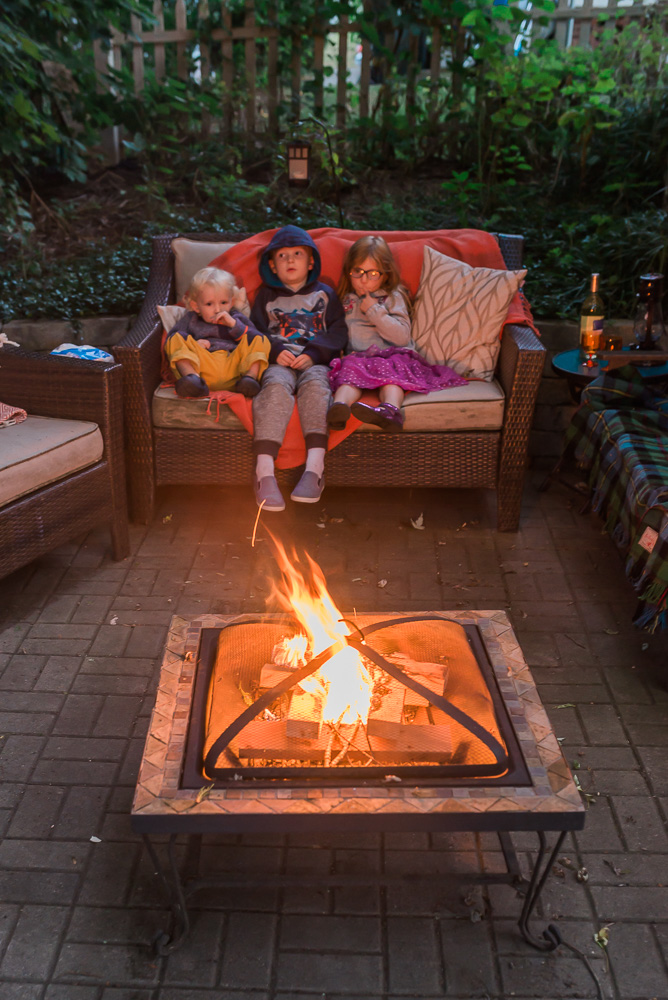
We’ve had this fire pit for years now and every time we use it we think “Why don’t we do this more often?!” Now that the cool nights are mostly bug-free, I see a lot more s’mores and wine in our future.
end-of-summer-campfire-20

This metal wall art makes our outdoor space feel more like a room.

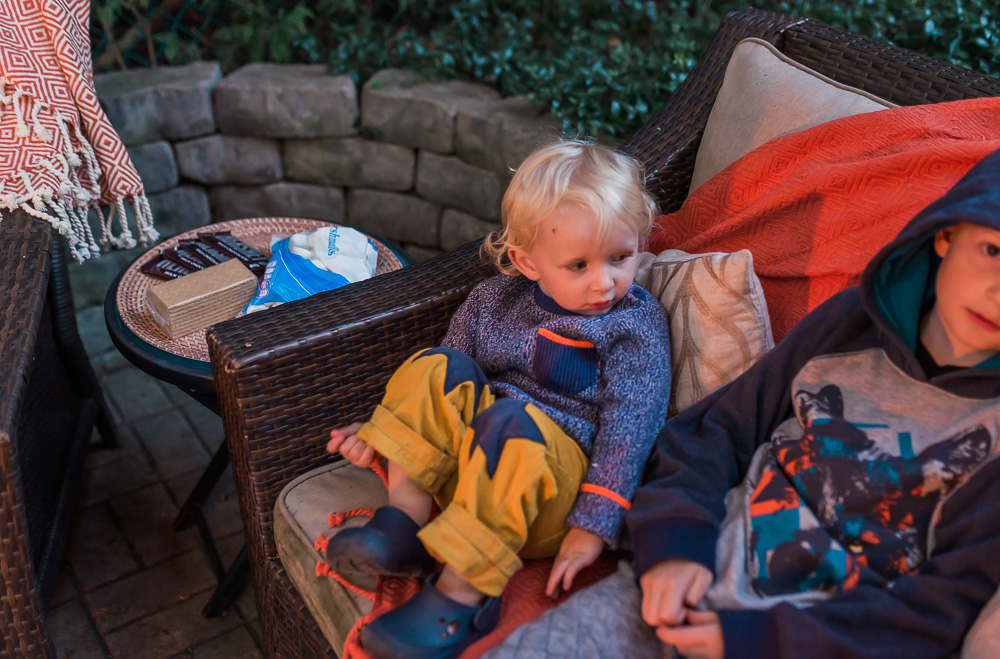
One of the best parts about a backyard campfire is the ability to leave my newborn sleeping in the house while we roast marshmallows. Newborns near the fire pit seem like a poor choice – it’s hard enough controlling a clumsy toddler near the fire pit – so it was nice to be able to relax a little. In previous years, the kids seemed to like the idea of s’mores only in theory, but this year they ate as many as we would allow.

end-of-summer-campfire-8

end-of-summer-campfire-9

end-of-summer-campfire-10

end-of-summer-campfire-7

end-of-summer-campfire-12

end-of-summer-campfire-15

end-of-summer-campfire-16

end-of-summer-campfire-17

end-of-summer-campfire-18

end-of-summer-campfire-19

end-of-summer-campfire-22

end-of-summer-campfire-24

end-of-summer-campfire-23

Those blankets are my new favorite thing and I can’t wait to use them for lots of fall photo sessions. I’m sure the wine glasses will find a way to be useful as well. A big thanks to Wayfair for sponsoring this post and encouraging us to get out and enjoy our backyard campfire!

Mixed Berry Cake With Lemon Whipped Cream Icing

Wednesday, May 25th, 2016

CampaignGraphic

A Cake Off you say? Don’t mind if I do.

Mixed Berry Cake With Lemon Whipped Cream Icing_-6

When it comes to Team Cake vs Team Pie, I am Team Why Can’t I Have Both? There’s no such thing as too much dessert. When I was looking for inspiration for a cake to submit for this contest, I searched Pinterest for cake and might have ended up eating half a box of cookies because it made me so hungry. This is why I am not a food blogger.

Half way through mixing the batter I realized I needed 3 9-inch cake pans but all I had in my cabinet was 1 9-inch cake pan and 2 8-inch cake pans. I thought really hard about how to make that work before giving up and sending my husband to the store to get the right pans. Be smarter than me and make sure you have the cake pans you need BEFORE you’ve already separated all the eggs and have the mixer going. This recipe has kind of a lot of steps, but I promise it’s worth it for the results: moist but light cake with an amazing flavor and super light frosting with exactly the right amount of sweet.

Mixed Berry Cake With Lemon Whipped Cream Icing_-11

Mixed Berry Cake With Lemon Whipped Cream Icing_-7

Mixed Berry Cake With Lemon Whipped Cream Icing
Adapted from A Latte Food

Cake
    • 4 eggs, separated
    • 3/4 cup butter, softened
    • 2 Tbsp vegetable oil
    • 1 1/2 cups sugar
    • 2 1/2 cups flour all purpose flour
    • 2 Tbsp cornstarch
    • 1 Tbsp baking powder
    • 3/4 tsp salt
    • 1 cup milk
    • 1/3 cup greek yogurt
    • 1 Tbsp lemon juice, fresh
    • 2 tsp vanilla extract
Berry Puree
    • 2 cups mixed berries (I used raspberries, blackberries, strawberries and blueberries)
    • 3/4 cup sugar
Lemon Whipped Cream
    • 1 pint heavy whipping cream
    • 1 8 oz cream cheese
    • 2 Tbsp lemon zest (about the zest of 2 large lemons)
    • 1/2 cup powdered sugar
    • 1 tsp lemon juice
Extra berries & mint to decorate
Preheat the oven to 350 and spray your cake pans with non-stick spray.
Make the berry puree first: throw all the berries (hull strawberries first) and the sugar in a food processor or blender on high until it’s well mixed. You can strain it if you hate seeds but they don’t bother me. Set aside.
Next the cake: separate your eggs and set aside. In your mixer, whip the butter for a minute or two until it’s fluffy. Add the vegetable oil and mix for another minute. Gradually add in sugar and eggs until everything is well combined, scraping down the sides of the bowl when needed.
Mix your dry ingredients in a separate bowl (flour, cornstarch, baking powder, and salt), then mix your wet ingredients in another bowl (milk, lemon juice, vanilla extract, and greek yogurt). Alternate adding wet and dry ingredients to your mixer until just combined. Whip your reserved egg whites until they form stiff peaks, then fold them into the batter, gently but completely. Divide your batter as evenly as you can into the three prepared cake pans.
Add about 1/3 cup of berry puree to each pan, using a knife to swirl it around. The kids really loved this part, so it’s a good time for helpers. Be sure to reserve any leftover puree to drizzle on your plate or spoon over the cake when you serve it.
Bake for 25-30 minutes until a toothpick comes out clean. Mine was perfect at exactly 25 minutes.
For the frosting: whip the heavy cream on high for a few minutes until it starts to thicken. Add in the lemon zest and vanilla. Slowly add the powdered sugar (add too fast and it will end up all over your kitchen) and then the cream cheese. Beat until the frosting is light and fluffy.
Once your cake is done and cooled, put the bottom layer on a plate or cake stand. Top with about a cup of frosting, spreading it all the way to the edge. Repeat for all three layers, with extra frosting for the top. Use a large knife or spatula to spread any frosting that leaked out from between the layers evenly around the sides. You can fully frost them if you want but the golden cake showing through is so pretty I left mine sparse.
Decorate the top with extra berries and mint leaves to make it extra fancy and really impress all your guests. It’s a big cake and serves about 15, as long as no one cuts a piece that’s 1/4th of the cake. Which I totally did when we had leftovers the next day. Be sure to store it in the fridge if you’re keeping it overnight.
  Mixed Berry Cake With Lemon Whipped Cream Icing_-8
Mixed Berry Cake With Lemon Whipped Cream Icing_-13
Mixed Berry Cake With Lemon Whipped Cream Icing_-17
If you think this looks delicious and want to make it – or just add it to your aspirational dessert Pinterest board (doesn’t everyone have one of those??) – you can pin the graphic below! This is a Cake Off and I’m in it to win it, despite not being a food blogger.
Mixed Berry Cake With Lemon Whipped Cream Icing YUM!

Sofa Fort City {Sponsored by Wayfair}

Tuesday, November 17th, 2015

SofaFortCityBanner

Our big (ugly) family room couch is one of those sausage-casing monstrosities, where all the cushions are attached, with built-in recliners and cup holders. It’s truly hideous. But while we’re in the “Oh my god where did you get that yogurt?!” stage of children, there’s no point in having NICE furniture, so I settled for comfy and functional in a beige color that hides dirt.

The biggest problem with that kind of couch (besides ugly) is that it’s pretty useless when it comes to couch forts, and couch forts are an essential part of childhood. Luckily, when I was trying to fancy-up our living room last year I found a nice mini-sized couch that a) is also a good dirt-hiding shade of beige and b) has two nice huge cushions that make an excellent fort wall. The kids LOVE that couch – it’s the perfect size for them to spread out and watch iPad, set up all the dolls into elaborate tableaus or just climb all over while they hit each other with lightsabers. Lovingly, obviously. Lovingly hit each other with lightsabers.

I got an email from Wayfair saying they put together some super cute sofa fort plans and asking if my kids would be interested in building one. They even sent a super cozy Lush throw blanket to get us started. Check out their fun ideas:

wayfair blanket fort plans

We chose the Dreadship Blanket and got to work rearranging the furniture, finding supplies and collecting throw blankets and pillows.

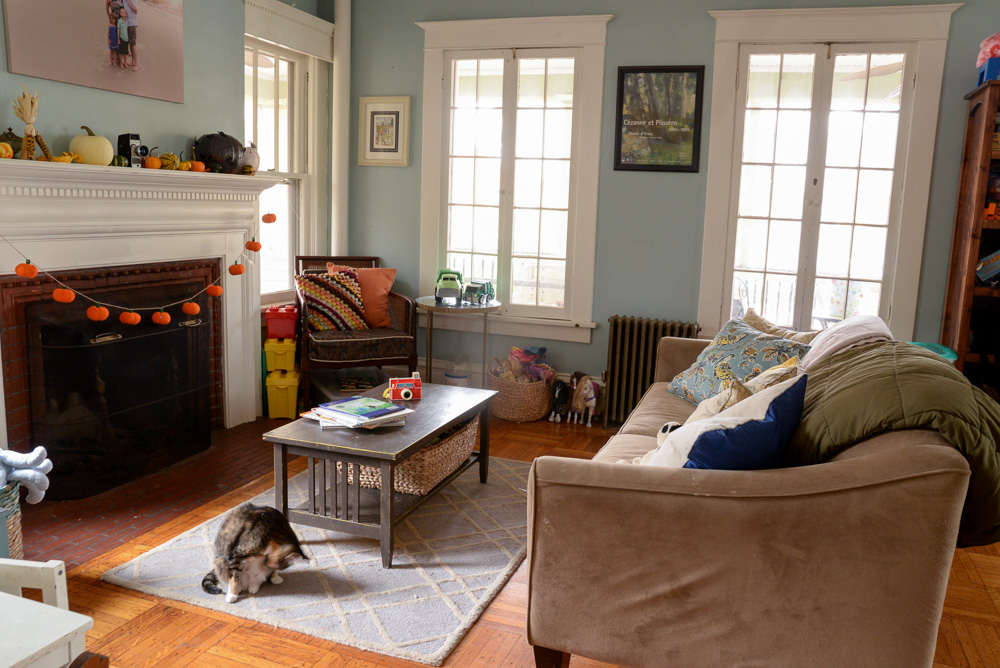
Real life talk: This is what passes for “super clean and organized” in our living/play room. It’s half grown-up, finished space (art! mirrored table! fireplace! throw pillows!) and half kid zone (toys! more toys! even more toys!!!). Please ignore the photobombing cat.

couch fort resize

couch fort resize-2

And here’s what happened when we created our own Dreadship Blanket:

couch fort resize-3

couch fort resize-6

couch fort resize-5

couch fort resize-7

couch fort resize-9

couch fort resize-13

couch fort resize-11

couch fort resize-15

couch fort resize-16

couch fort resize-17

couch fort resize-22

couch fort resize-21

couch fort resize-23

couch fort resize-24

couch fort resize-25

couch fort resize-27

couch fort resize-28

couch fort resize-30

couch fort resize-32

couch fort resize-34

couch fort resize-35

couch fort resize-36

We left the fort up for a week before I wanted my living room back for a grown up event, but pretty much any time they want to rebuild a couch fort I’m on board. It’s the kind of fun, creative, independent play that ends up with about 80% cooperation and only 20% screaming at each other. In case you don’t have multiple kids, those are REALLY good percentages.

Thank you again Wayfair for the fun idea!

Home For The Holidays {Wayfair Giveaway!}

Tuesday, December 9th, 2014

If I posted a picture of my house right now, I’m pretty sure Wayfair would throw me out of their Homemakers program. But since they totally understand my aspirations to one day have a catalog perfect home, they’ve kindly sponsored a post so I can at least DREAM about getting organized. 

We’re hosting a bunch of people this year, not for Christmas exactly but for Caroline’s birthday party the weekend before. Don’t ask how party planning is going, the answer is AHHHHHHHHHHHHHHHHH. But even if I’m running around like a crazy person writing a menu 12 hours before the guests show up we’ll have a house full with more company staying at hotels. No matter how behind I get, I am committed to the house being MAGICAL and FESTIVE and WELCOMING, so here’s a look at how I’m getting my home ready for the holidays.

christmas baby

Linc is totally ready for the holidays with those jammies

(more…)