Posts Tagged ‘tips’

5 Tips To Survive Summer With Little Kids

Thursday, June 7th, 2018

Blog disclosure: This is a sponsored conversation on behalf of The Breastfeeding Shop via SoFluential Media. All thoughts and opinions are my own.

Guys, summer is here!

You can read that in a super happy, excited voice: Horray! It’s summer! No school! Beach days! Ice cream for dinner!

Or you can read that in a slightly panicked voice: Summer is HERE. You are out of time to find camps or activities and I hope you like making 17 separate meals a day.

I have a million children. Technically, the actual number is four, but let me tell you reality means absolutely nothing when all of them are hungry/bored/tired/mad/have a tiny hangnail/thirsty/fighting at the same time. Four kids at four different ages means four different sets of needs and ability levels and nap (or no nap) schedules. Did I mention I also really hate having to feed everyone all the time? I really hate that part.

After 9 summers as the parent of at least one baby I’ve learned a lot about how to survive – and enjoy – summer, even with a million kids, even when I’m solo-parenting, even when I’m running on empty by lunchtime and still have a long way to go before bed. Here are my top 5 best tips to survive summer with little kids.

  1. Add more children. OK, this seems counterintuitive, but hear me out. Some of our easiest playdates are with my friend Sarah, who also has four children. Her kids + my kids = so many kids there’s always someone to play with or talk to or rope into your particular imaginary world. My babies love having big kids to play with who aren’t the regular big kids they see every day, and then when my big kids see the babies getting attention from other kids they remember that they love their babies too and then everyone just seems more fun.
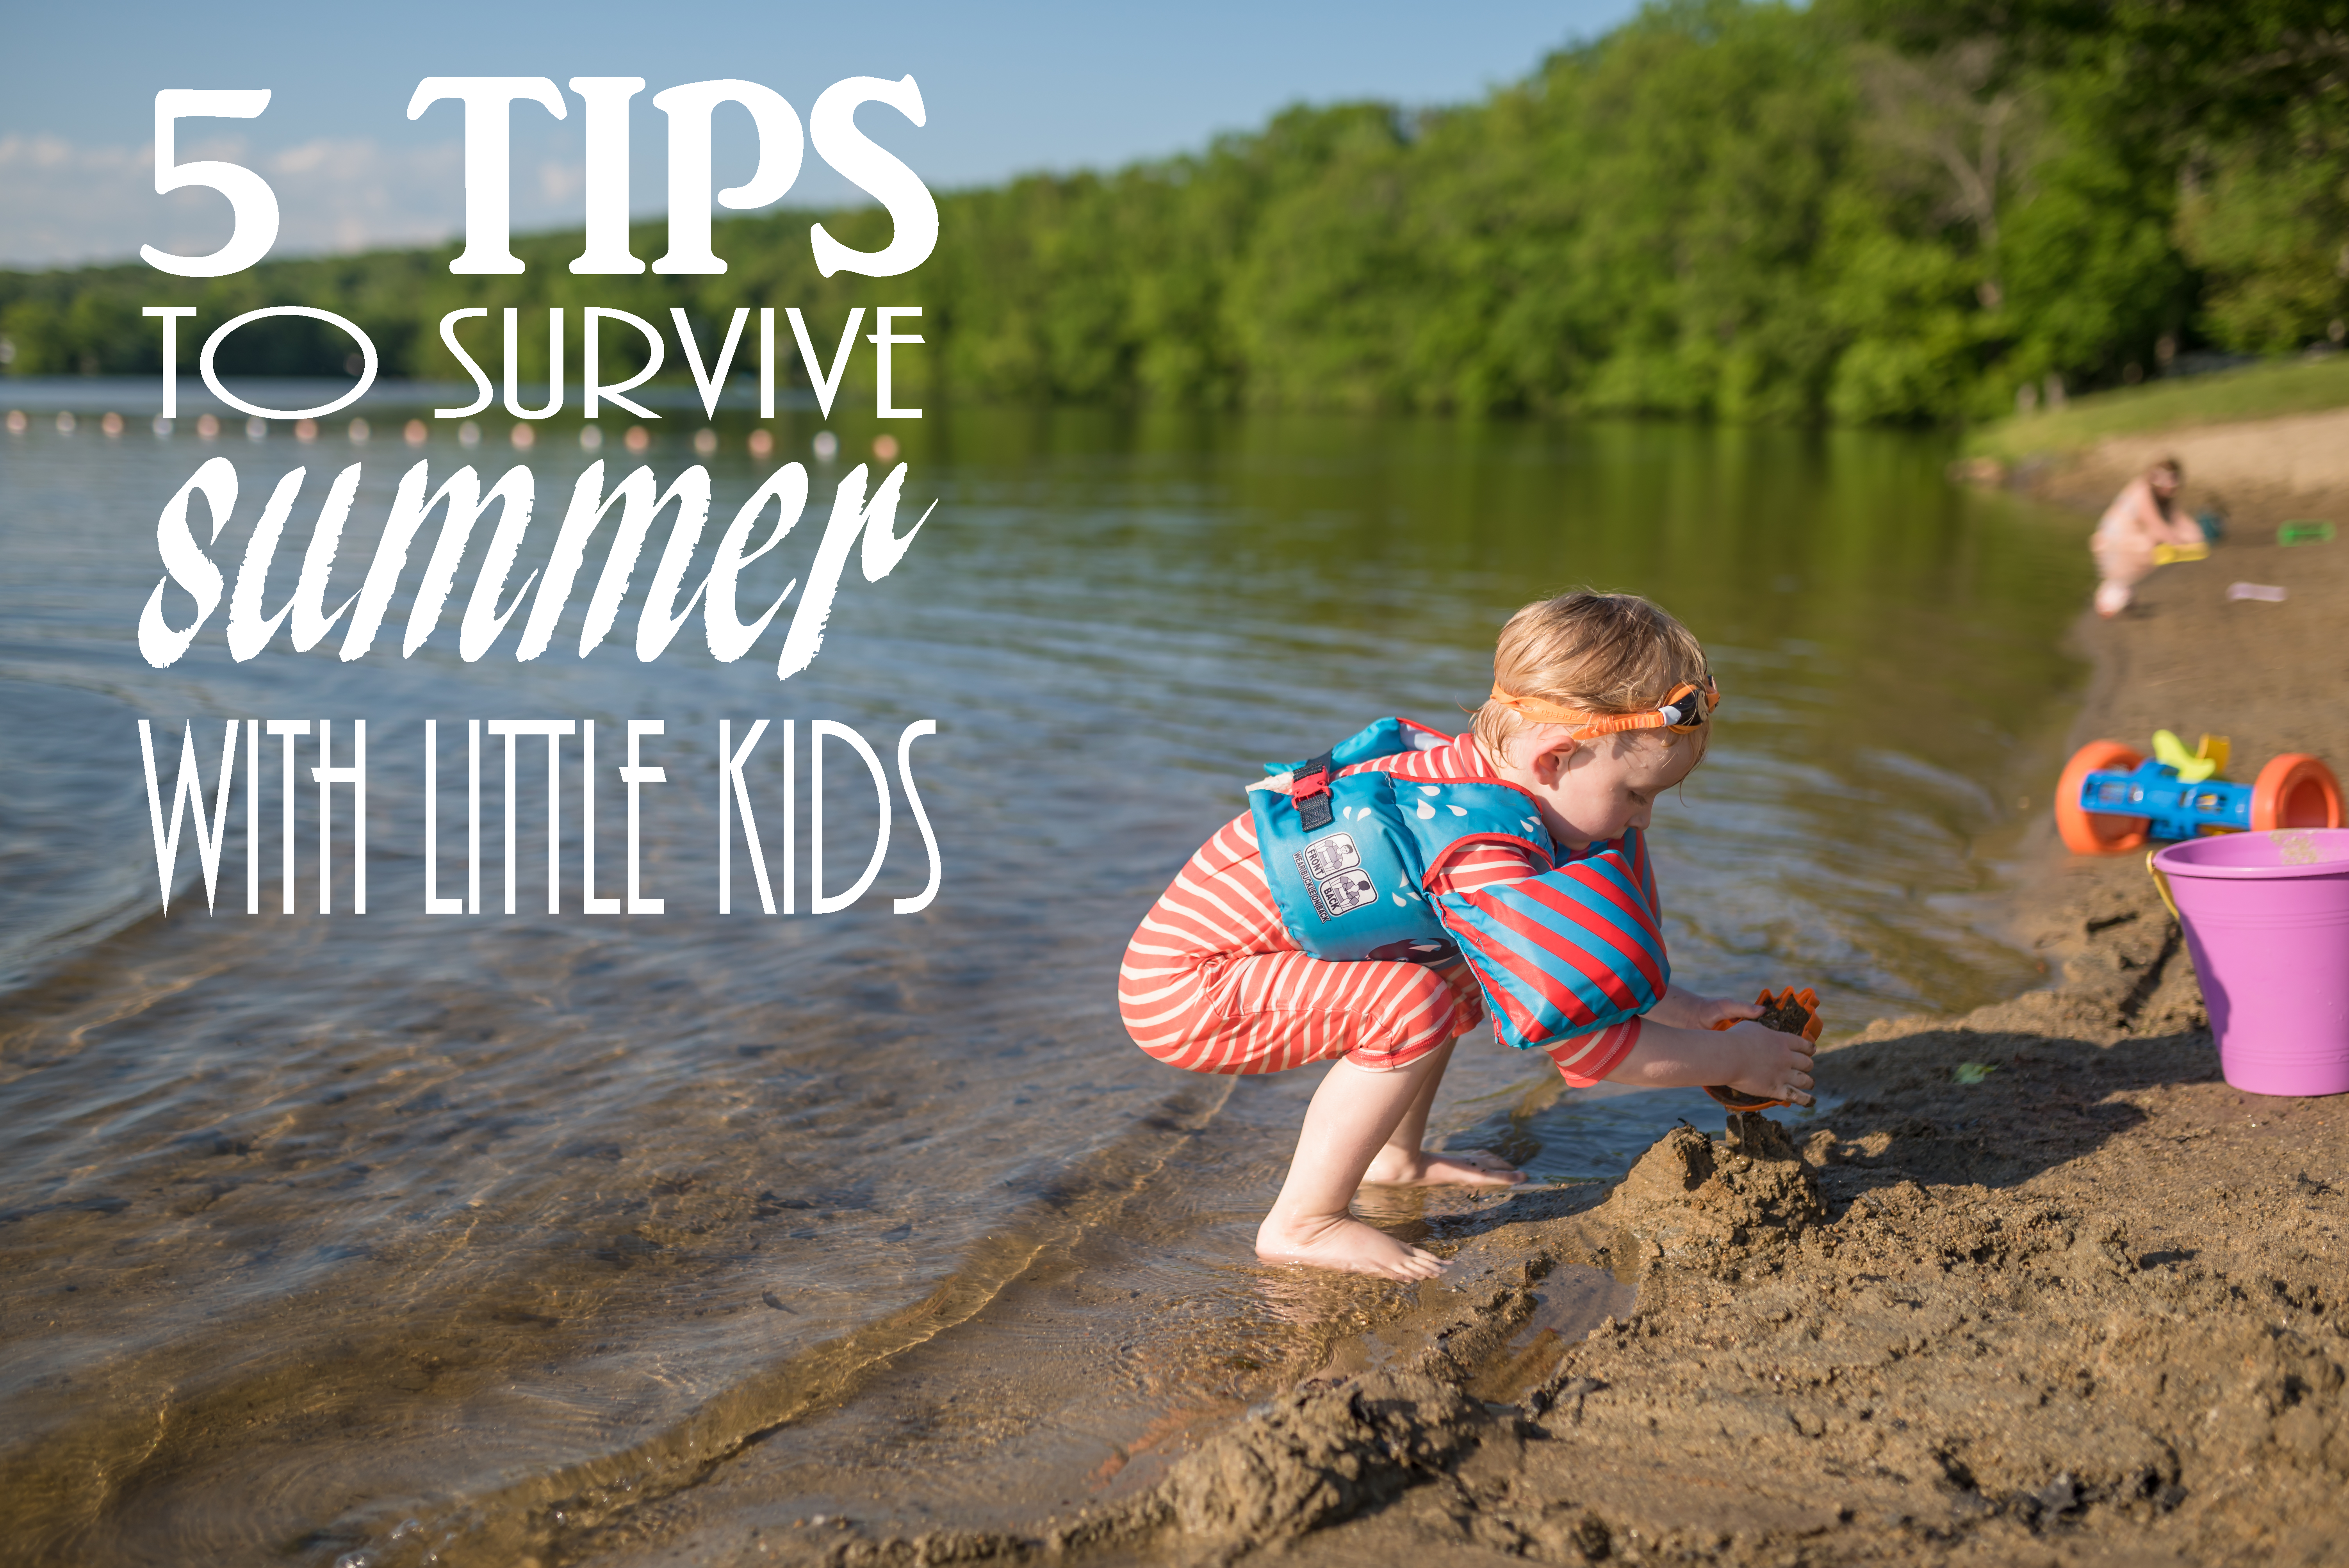
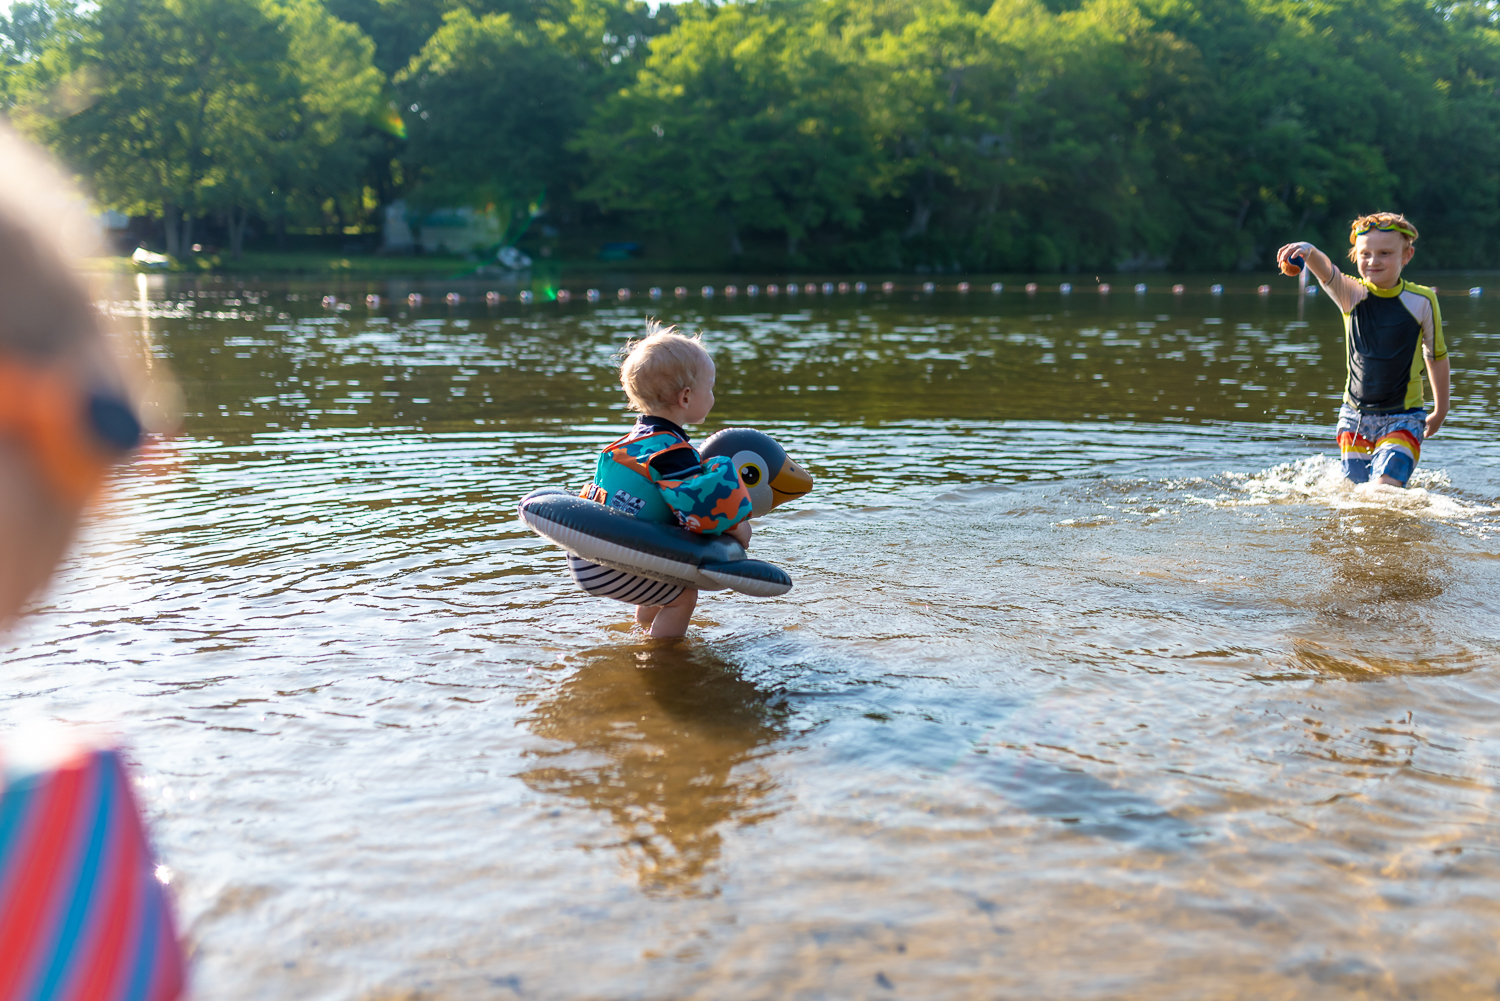
  2. Find your happy place. Our happy place is The Lake. The Lake is a local beach club we pay a membership for each year. It has lots of big trees for shade, picnic tables, grills, a big grassy field for running around, a beach for digging and swimming, a dock for fishing, swings and a playset for climbing and it’s awesome. The Lake requires some supervision, but not nearly as much as you might think (see tip 3). If you don’t have a lake, think of somewhere your whole family enjoys – somewhere kid-friendly, where you might run into other kids for your’s to play with, where you can SIT DOWN and relax. It might take a few tries, but one you have a happy place it can be your go-to all summer long when you can’t stand to stare at the inside of your house any longer but don’t have the energy to do something new. Go every morning. Go every afternoon. Don’t worry you go to the same place too much, your kids don’t mind.
  3. Floaties. Listen, kids are going to try to drown themselves. It’s just what they do. If you have a tiny baby who can’t walk or crawl yet, your summer will be fine. If you’ve reached the mobile stage, going anywhere near water is beyond stressful. So make sure to always bring your sustainable swimwear with you. We have the floaty rule: if you are near the water, you wear a personal pool flotation with drink holder. The baby wears one 100% of the time at the lake. The toddler wears one 85% of the time at the lake. The big kids – who are 9 and 7 – had to pass a swim test last year and this year before I let them give up the floaties. If we go to a pool, anyone who can’t touch the bottom wears a floaty. Our friends enforce floaty rules with their kids, my parents enfore floaty rules at their house, it’s just non-negotiable. We have found that the Speedo brand Splash Jammers are ideal – they have shoulder straps as well as arm floats, they’re approved by the Coast Guard as life jackets, and even my 1-year-old can’t get it off on his own. Target sells them. WEAR YOUR FLOATIES.
  4. Lower your standards. For real, set that bar at a level you can achieve by noon every day. Did your children eat something? Does the baby have a clean diaper? Did you remember to eat something too? Is your house clean enough that you could escape in case of a fire? Then you’re fine. Tomorrow you can put away some laundry or do the dishes. Next week you can plan a fun outing to the zoo or the splash pad. But right now, you’re doing fine. It’s fine. You’re a good parent.
  5. Have fun. This tip is sort of like “treasure every moment because you only get 18 summers with your kid before they’re old enough to leave home” but that is bad advice no one needs. The days are long but the years are short is the same thing, but again, the days are SO long it’s not helpful to remind anyone it won’t last forever. But we can try to have fun, even when we have small humans to take care of. Put on a bathing suit and get in the water with them. Have ice cream for lunch or dinner (or lunch and dinner). Roll your windows down in the car. Play music really loud and have a dance party. My kids get such a kick out of me being Fun Mom, they act surprised and delighted every time. It’s like when Fun Dad chases them around pretending to be a dinosaur or Fun Grandma lets them pick out candy at the grocery store. You can be fun too! You’re the boss, even if you bend the rules a little bit for a special treat. It won’t ruin your children forever, I promise.

Military friends! One way to make your life easier when you have a baby is getting a . If you have Tricare, all you need is a prescription from your doctor and The Breastfeeding Shop will ship a pump right to your house. If you or someone you know is pregnant or has a new baby, be sure to tell them about this program, because having a pump is a lifesaver when you’re nursing. My baby will be 2 in August and I still need my pump occasionally (yup, still nursing, nope, no plans to stop). Check out for more information.

Photography: Making The Most of a Convenient Location

Monday, April 3rd, 2017

I wanted to take some photos of Caroline in her new princess dress last week, but it was dinner time and Multicultural Night at school so my timeframe for this magical photo shoot was about 7 minutes. I live on a teeny tiny lot in a city neighborhood, so meadows and forests are in short supply. We do have an empty lot across the street, but most of it has been turned into a community garden (the vegetable kind) by a church.

But the weather was warm-ish and the sun was shining and my model was cooperative, so we popped across the street to borrow their grass, figuring we would just be making the most of a convenient location.

And we found a beautiful field of crocuses!

But it wasn’t actually that magical. It was just a little square of flowers between a driveway, a dead spot, and the church’s mulch pile. Here’s the cell phone pullback shot of Caroline in the same location:

There are several tricks you can use to maximize a less-than-ideal location if it’s all you have to work with. I knew when we went out to shoot I would be trying to disguise the background so I choose my 85mm f/1.8 lens, which is a medium length and is good at separating the subject from their surroundings. Once we found the flowers I decided to shoot at about f/2.2 or f/2.8 so I could include a good slice of the photo in focus – I wanted to be able to get Caroline’s whole profile in focus instead of just her eyelashes, or her whole body as opposed to just a sleeve.

Here are 5 more pieces of advice to help turn a bad spot into a good spot:

  1. Light! The sun is starting to go down and partially blocked by some of those trees, which means a great glowy kind of backlight instead of harsh overhead shadows. If the sun had been coming from the opposite direction I would have shot the other way (which would have been unfortunate, because there’s pavement the other way).
  2. Work your angles. I took a lot of these photos from overhead with Caroline crouching down, which includes a lot more grass/flowers and a lot less background. You can also get super low yourself, and shoot straight across the ground – you’ll end up with fewer distracting background elements.
  3. Get close. Fill the frame with your subject instead of trying to get too much of the environment. Yes I wanted to capture the crocuses, but having her hold them or shooting the flowers on their own is a good option.
  4. Horizontal vs vertical can be your friend. I shoot horizontally 90% of the time, but in this location I didn’t have a lot of space to work with. To create some variety in my shots, I took a series of photos vertically. Sure, she was standing almost next to a dirt pile, but because the photo is narrow you can’t see it.
  5. Don’t say cheese. Almost none of these photos have Caroline looking at the camera. Instead, you’re looking at what she’s looking at – her hands, the flowers in front of her, etc. Let your subject guide the viewers eye into the foreground instead of the background. Then if you are looking for excellent photographers in Sydney then see those as they are top-notch and always deliver incredible photos.

If this was a client shoot instead of just a fun session for Caroline, I would have taken the extra step in  post-processing and fully removed the fence posts, dirt spots, and blue trash can from the background of a few of these. It’s not a hard fix in Photoshop, but I’ve gotten in the habit of using only Lightroom to edit my 365 photos or blog photos, just because it’s so easy.

Let me know if you have any questions!

Making the most of convenient locations

5 Tips For Taking Great Photos Even If You Don’t Know What You’re Doing

Thursday, August 16th, 2012

Let me start by saying that while I have learned a LOT about taking photos in the past 3 years, I am by no means an expert. I’m not even a photographer, since my eyes glaze over when people start talking ISO and shutter speed. The only part of photography I actually understand is aperture, and even then I only know a small number means I get a fuzzy background and that looks fancy so, like, do that? Right?

But after owning a Nikon D90 for a while and reading a zillion articles and books and tutorials I feel like I’m qualified to give 5 tips for taking great photos even if you don’t know what you’re doing. And the top 5 things I’ve learned about photography DON’T involve super fancy camera settings or post-processing. Photoshop and Lightroom are amazing programs but if your main goal is to take better pictures of your kids – either for your blog or just for their scrapbooks – you don’t need editing software. I promise. Just be more mindful of the following things when you’re snapping away:

1. Use natural light. It’s all about the light. Yes, your camera has a flash and no, I’m not saying flash is evil. Skilled photographers can do amazing things with artificial light. But when I use flash, everyone comes out looking like a deer in the headlights and/or a flesh eating zombie so I take advantage of natural light whenever possible. I don’t mean direct sunlight – it can often be too harsh – but light coming through a window, a shady spot under a tree or that magical golden hour right before sunset are all better places to take you kid’s monthly baby photos than under your ceiling fan lights at 8 pm. (This goes DOUBLE for photos of food.)

5 Tips For Taking Great Photos Even If You Don't Know What You're Doing

August, 6pm – the light is behind the trees so even though Caroline is backlit it’s the nice halo-type of backlit. Plus it shows of her ginger curls in a way head-on light wouldn’t.

2. Pick a great location. My couch is moss green, filthy and makes a terrible backdrop for photos. My kitchen is OK but the dark counters and wood cabinets make it a cave. The rest of my home is always a mess. But the park less than a mile from my house is gorgeous – stone pathways, arbors, fountains, lots of shade, space for playing and running and bikes. I’m not capturing our “everyday” in the sense that we are in our house but I am capturing a typical afternoon in our neighborhood. It’s easy to bring the camera along, sit in the grass and let the gingers run in circles while I mess with my settings. Having a great location makes all the rest of the tips MUCH easier.

5 Tips For Taking Great Photos Even If You Don't Know What You're Doing

This was spontaneous wish-making…something that wouldn’t ever happen at home in our family room.

3. Pay attention to your background. This is why you’re shooting at the park instead of in your house (as cute as my tiny gingers are in those photos, the background prevents them from ever becoming prints I hang on the wall). But it also means take three steps to your left to avoid capturing that trashcan or people scooping dog poop or a couple having a fight behind your kid (all actual things I avoided during this shoot). Even if you are in your house, do your best to get blank walls, plain cabinets and doors in the background rather than piles of brightly colored toys and laundry. You can crop in post-processing – even basic, free programs allow cropping – but these are tips for AVOIDING all of that so try to remember to look behind your kid’s adorable face.

5 Tips For Taking Great Photos Even If You Don't Know What You're Doing

Things going on around Evan that you can’t see because I framed the photo well – trash can, people fishing, teenagers loitering and smoking and doing general annoying teenagery things.

5 Tips For Taking Great Photos Even If You Don't Know What You're Doing

There were some people sitting on the edge of the fountain at first, so I took close up shots until they wandered off. Then I backed up and let Evan throw his penny.

4. Children looking at the camera are better than children not looking at the camera. I should have just called this tip “Bribery”, but that seemed crass. I take a LOT of pictures of the backs of heads, butts, shoes, etc. But when you’re trying to take memorable photos, try to get your kid’s face as much as possible. Some of the best ways to get a child to look at you are shouting, waving your arms, playing “Can you see my eye through this camera?” and promising candy/ice cream/ponies. Mostly it’s a matter of following step number 5…

5 Tips For Taking Great Photos Even If You Don't Know What You're Doing

As cute as Caroline’s ruffle skirt is, her “leader of the tiny bike gang” face is way cuter. (Although, technically, the composition of the facing away photo is better…BIKE GANG. I MEAN COME ON.)

5. More is more. As long as you’re shooting digital, keep shooting. At a photography class just a couple weeks ago one of the pros told us to STOP taking so many photos and really focus on getting the shots right the first time. I am definitely going to work on that…soon-ish. But if you aren’t a pro, my advice is take tons of pictures, especially of kids. You might only get a few worth saving but that’s the magic of digital – delete, delete, delete. When your kid is running away from you, shout their name and start snapping – those just-turning-around faces are great and you almost always get eye contact. The same goes for jumping, swinging, splashing, dancing, and running kids – it’s better to have too many shots to choose from than miss a moment you loved.

5 Tips For Taking Great Photos Even If You Don't Know What You're Doing

Dancing kids are hard to keep in focus but too cute to miss, so I took at least 30 pictures in 60 seconds.

5 Tips For Taking Great Photos Even If You Don't Know What You're Doing

Swinging pictures are even harder than dancing pictures (plus the light on the playground wasn’t as good) but I got this one from a collection of many.

I’m not saying you’re going to get magazine-worthy photos from your point-and-shoot or your cell phone camera, but I wish I had known all this stuff from the beginning when I was taking pictures of Baby Evan with my Panasonic. Just remembering to set the baby down somewhere without burp cloths in the background would have made a huge difference.

If you have any questions, feel free to ask and I’ll try to help or find someone to help. And feel free to link photo tips that you’ve found helpful (or written!) in the comments.

All my photos in the post are straight out of my camera (Nikon D90, 50mm 1.8f lens) – no cropping, no exposure changes, no editing. All I did was watermark and resize the files for uploading. I did use my camera’s manual settings when I shot but I do that fairly often now and still don’t get great results. These photos look nice because I took them mindfully, not because I have amazing technical skills with a DSLR.